Page 1 of 2
Internal Hull Storge Dimensions
Posted: Sat Dec 08, 2007 12:32 pm
by Captain Jim
Does anyone have a dimensional drawing(s) showing the storeage areas of the 2006 M26 that they would be willing to share? Is this type of information available from the factory?
Jim

Posted: Sat Dec 08, 2007 1:21 pm
by ALX357
pretty hard to measure, as they are irregular in shape. The storage spaces are not "finished" inside, and they are defined by the compound curved hull's inside surfaces, bulkheads, and ballast tank features. When you make enclosures or level floors inside them, they lose volume, for whatever usefullness you gain by having them defined.
Storage is best managed by filling them with numerous smaller canvas sports bags, soft-sided tool bags, etc. to keep them quiet during heeling and bouncing on waves. However large the storage cavities are, the size of individual items you can put in there is somewhat determined by the sizes of the access holes, the larger the volume of storage, the more of the items you can pack into them.
Maybe a better answer is to look at a schematic of the boat, showing the locations where storage is, and estimate by comparison to the 26' overal length of the hull, and the approx. 8' beam width of the boat.
Internal Hull Storage Dimesions
Posted: Wed Dec 12, 2007 4:12 pm
by dennisneal
Small sectional drawings of the 26M are available at the factory's website.
You might be able to scale these up to get a rough idea of the dimensions of the various storage locations.
Posted: Wed Dec 12, 2007 6:39 pm
by Night Sailor
I have to wonder why dimensions are so important. I think the best way to approach storage on small boats is to break quantities of things into smaller packages if possible and store in soft bags to comform to the constantly changing shape of hull and bulkheads.
Posted: Wed Dec 12, 2007 7:19 pm
by ALX357
Posted: Wed Dec 12, 2007 8:43 pm
by Night Sailor
Alx357, just affirming your advice works for me too....
Posted: Thu Dec 13, 2007 6:38 pm
by John McDonough
I used large plastic storage bins to fill my storage areas. Keeps things dry and secure. I had to cut some plastic bins to shape to force them in the access openings.
Posted: Thu Dec 13, 2007 9:18 pm
by ALX357
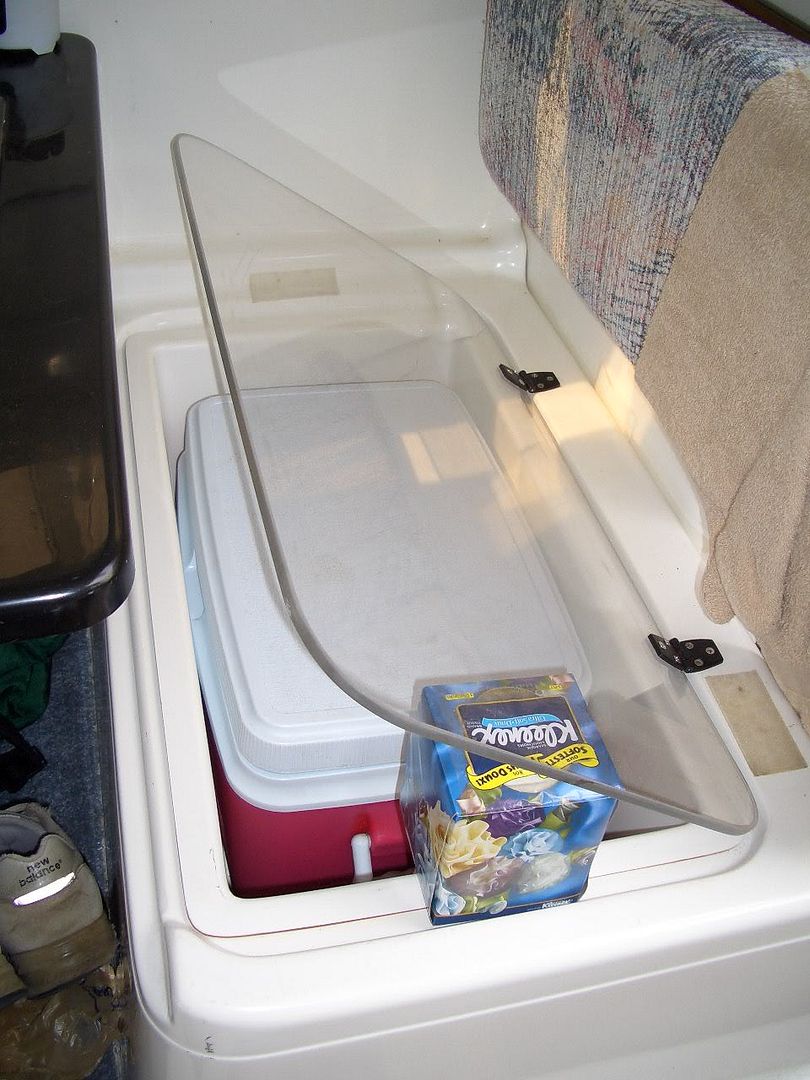
Here is an idea to replace those potato(e)-chip plywood access covers .... had them in for three years no problems, very flat and strong.
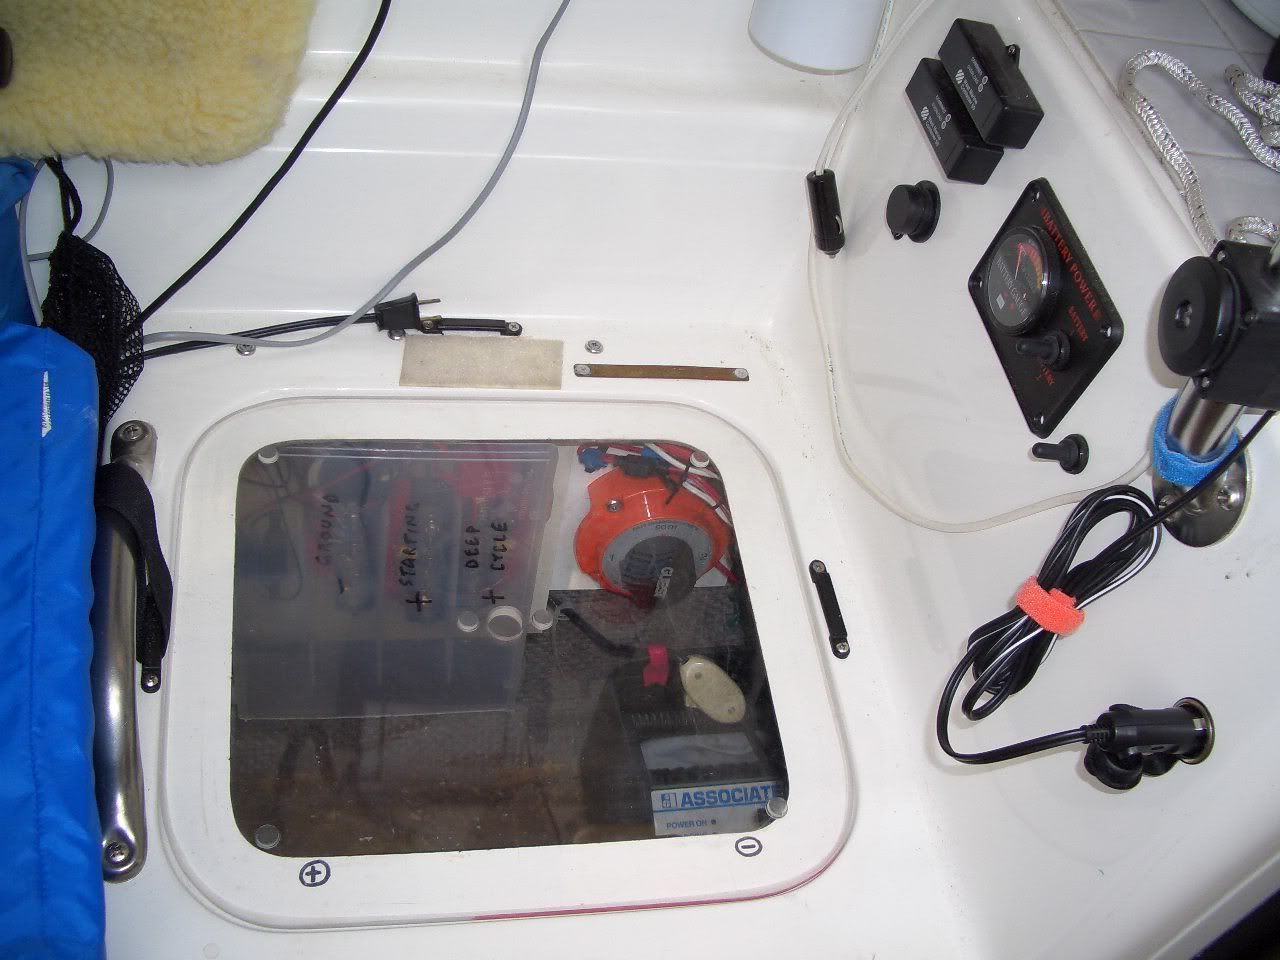
Acrylic, about 3/16 or 1/4 inch, I think. Lets you see what is in there, and stays flat. Hole in center for lifting, and adds for a bit of ventilation. One big 4x8 sheet cut carefully gave enough to replace every plywood cover in the boat.
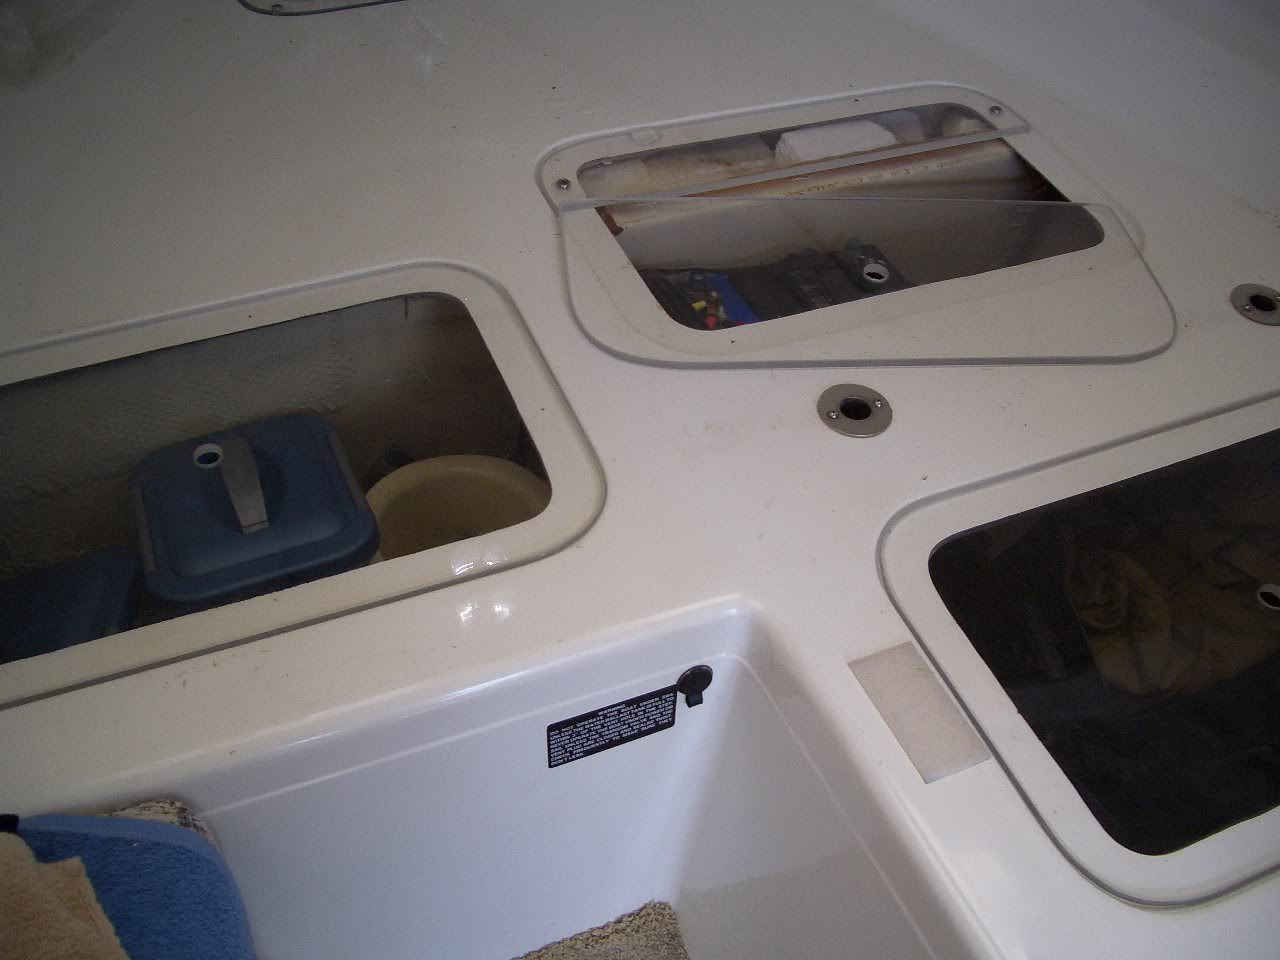
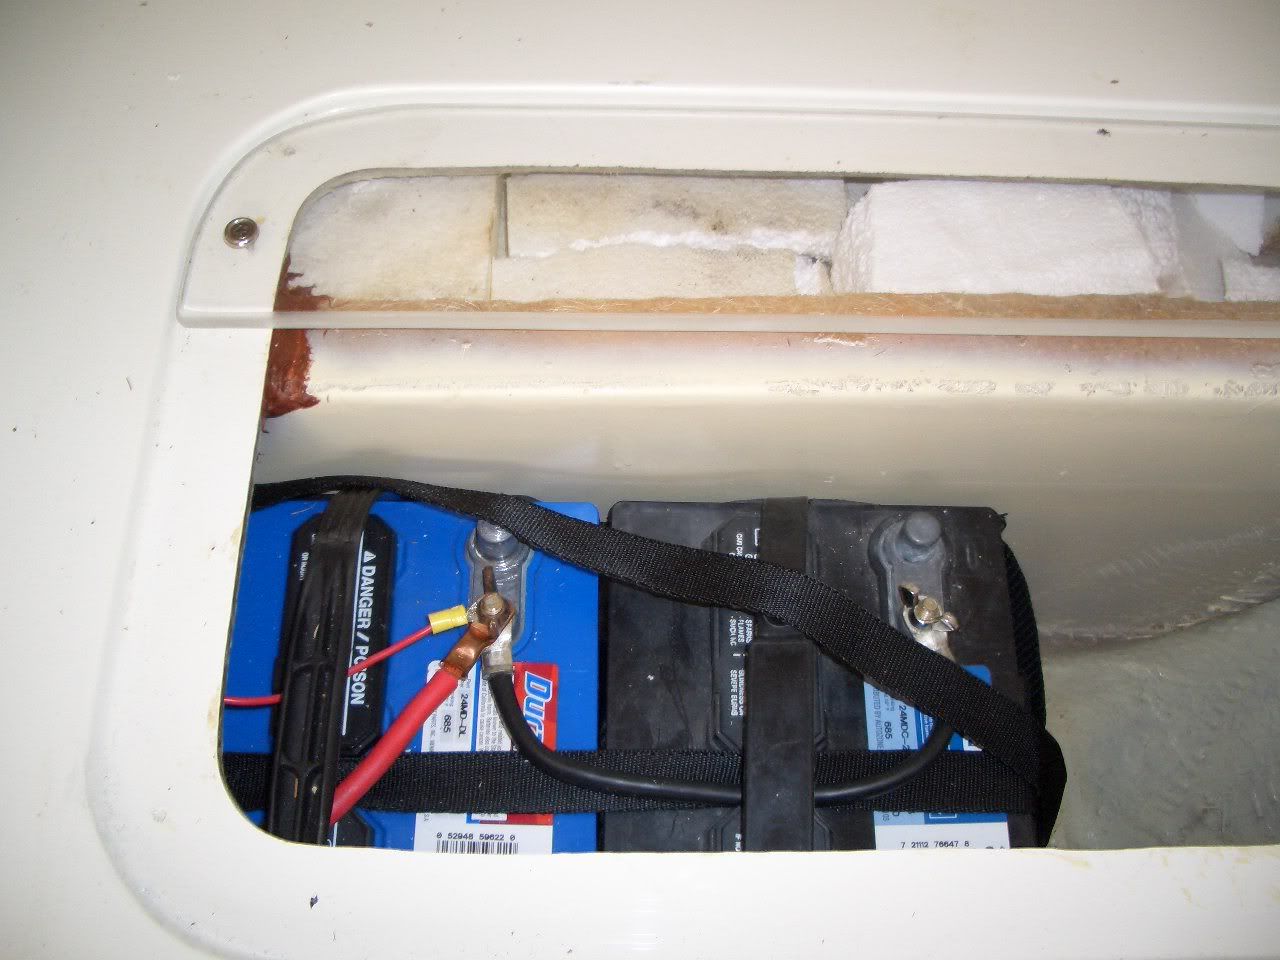
primary access to the two deep-cycle cabin batteries kept in the bow, close to the centerline, and with additional access thru the other two openings nearby.
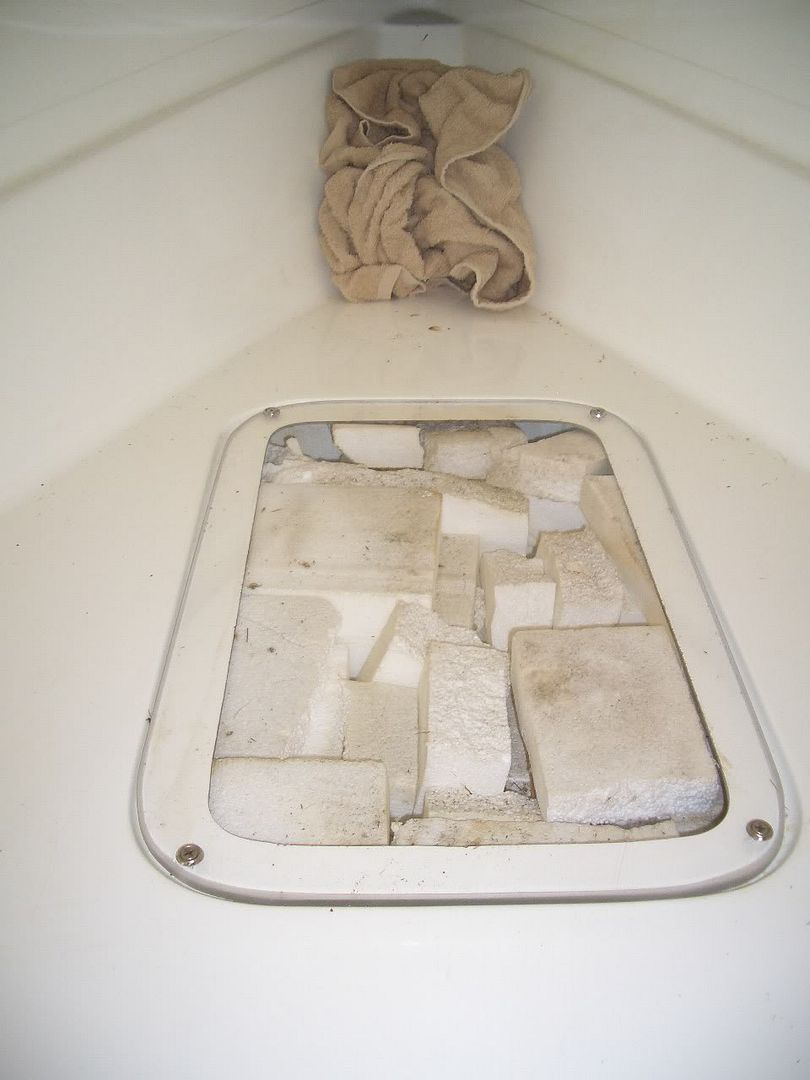
It is not especially attractive, these foam flotation blocks, but it is an essential component of the boat, and reassuring to be able to see them, and also the passive ballast vent hose that had not yet been installed when the pic was taken, but is now running right thru there to the bow.
...and hinges added to this one, with large regular cooler inside just fits space in their tub, and lifts out for filling, emptying, and cleaning, plus keeps stuff more insulated.
Posted: Fri Dec 14, 2007 7:11 am
by Captain Jim
ALE357 said
Here is an idea to replace those potato(e)-chip plywood access covers .... had them in for three years no problems, very flat and strong.
Acrylic, about 3/16 or 1/4 inch, I think. Lets you see what is in there, and stays flat. Hole in center for lifting, and adds for a bit of ventilation. One big 4x8 sheet cut carefully gave enough to replace every plywood cover in the boat.
ALX357; great job, I will be doing the same on our
BOLD VENTURE . I really appreciate your sharing this mod with us.
Thanks,
Jim
Posted: Sat Dec 15, 2007 5:21 am
by ALX357
'welcome...
... being able to see what is in there, is also easier if the interior hull surfaces are painted a light color.
Posted: Mon Dec 17, 2007 3:16 pm
by Terry
ALX357 wrote:'welcome...
... being able to see what is in there, is also easier if the interior hull surfaces are painted a light color.
Yes, that was one of the first things I did, sanded the bilges then painted them with white gelcoat.
I sure like your clear plexiglass covers ALX357, I have been contemplating such an idea for quite a while, now I am more motivated. So how much does a big 4x8 sheet cost, any guestimates? I am not even sure where to find anything that
(industrial) size. Maybe someone can point me in the right direction.

Posted: Mon Dec 17, 2007 3:38 pm
by dennisneal
You might try Associated Plastics (604)-251- 9441.
Great Idea
Posted: Mon Dec 17, 2007 4:25 pm
by pokerrick1
Wow ALX357 what a great idea. One 4 x 8 sheet huh? Now, if I can only find someone to do the work after I buy the parts
Rick

Posted: Mon Dec 17, 2007 6:54 pm
by ALX357
A local industrial plastic supplier sold me that sheet for about 100 dollars and maybe a dollar a cut. I laid out the cutting pattern, was a "Dutch" cut, meaning that part had to be cut off the long end first, and then the sheet was cut regularly after, to keep from cutting those first pieces wrong.
I no longer have the pattern, but it is a simple thing of taking the overall measurements of the existing plywood pieces, there will be maybe three or four different patterns/shapes/sizes, and several duplicates of some of them.
Then just draw out on a regular piece of paper, label the sides 48" and 96", and figure how to get the cover pieces out of it. Some of them may lay out better across-wise than lengthwise, depending, and they may determine a Dutch cut sequence. REMEMBER, there is a saw-blade thickness "kerf" wasted between each piece, lost to sawdust. I had some strips left over.
Another way, maybe dumber and easier if you have a large floor area or outside space, is take the pieces out of the boat, and just arrange them within a 4x8 foot confine, and then make a drawing showing how they fit best. Probably the sheet will do the entire
the same as it did for my

. But if not, you could just omit some of the ones in the very back of the rear berth.
The plastic supplier will have a good way to safely (for the plastic sheet) cut the pieces out and may appreciate your laying out the cut for them, but you could just list the sizes and number of peices you want, and let them do it. Leave the paper backing on as long as you can, certainly until they are cut, and I recommend until after radiusing them.
Finishing them is the time consuming part, I used a belt sander and then a palm sander to put the radius corners on, round and smooth them and all the edges on both sides. Use your plywood covers as a guide for the shape of the radius, if they fit well already. It was not necessary to me to make them polished on the edges, but you could. You could also do it with a router.
Then a small hole saw for the center holes, which I put in almost every one. and a chamfering of the holes for finger comfort.
After accomplishing that, you may want to make a clear two piece cover for the cabin companionway hatch door. Relieves that claustrophobic shut-in feeling when in the cabin, while providing visibility and is still rain-tight.
Good Idea
Posted: Mon Dec 17, 2007 7:36 pm
by pokerrick1
Great idea - - - like I said - - - now if I could only find someone to do the work after I buy the parts - - - because I am busy doing nothing and being skillless (without shop or tool skills).

Rick