Installing Transom Wedges on a Merc 60.
Posted: Sun May 27, 2007 11:45 am
With the talk lately of transom wedges, I decided I'd add a pair and document the process. While my steps are for a Merc 60 this should apply to pretty much any motor. Please don't take this as an endorsement for them, seeing as I haven't had a chance to try them out yet.
First you will need to gather together some supplies. For the wedges I purchased these:
http://www.overtons.com/modperl/product ... Wedge_pair
You can also find them at West Marine.
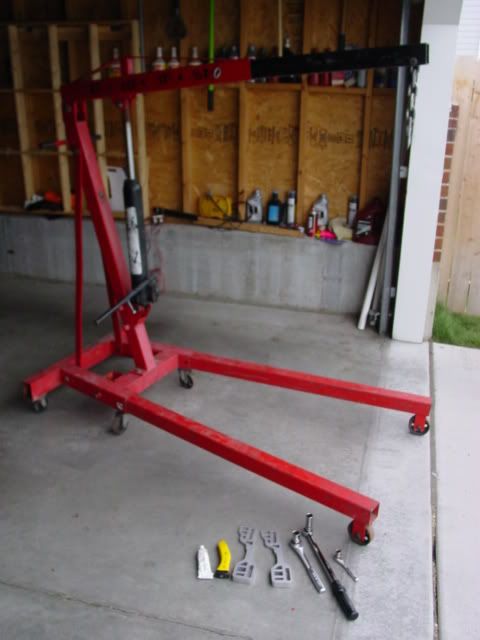
You'll also need an engine hoist, a few socket wrenchs, a 19mm regular and deep socket, a 13mm socket, a razor blade and some 3M 5200:
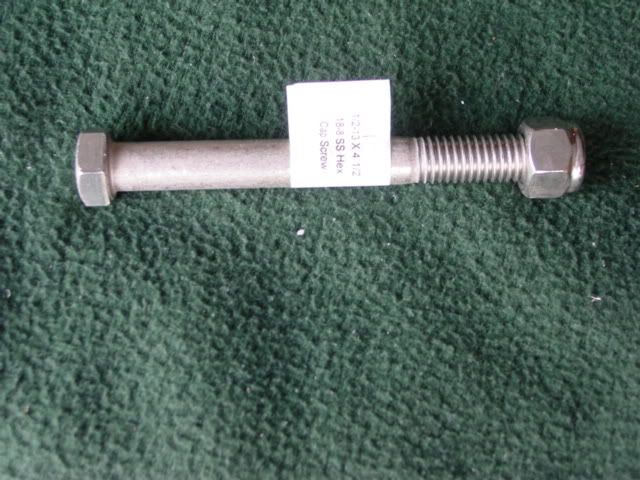
Finally, this is something I found out half way through, you'll need two 1/2" x 4 1/2" stainless bolts with corresponding stainless locknuts for the upper mounts.
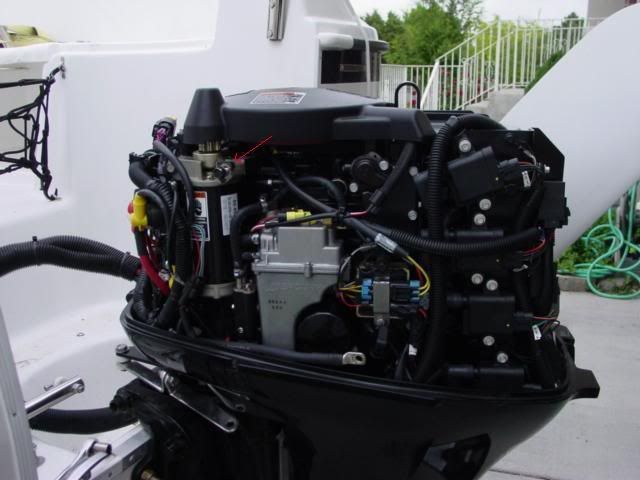
So now you have your stuff you'll have your engine that looks like this:

First remove the cover:

Next, while your boat power should be off, to be safe remove the negative ground cable witht he 13mm socket and also don't forget to remove the fuel line:
You'll notice at the top in the center of the picture above is a metal loop. That is what you'll attach your hoist to. Attach it and put just enough tension on it that the weight will be off the bolts after you loosen them.
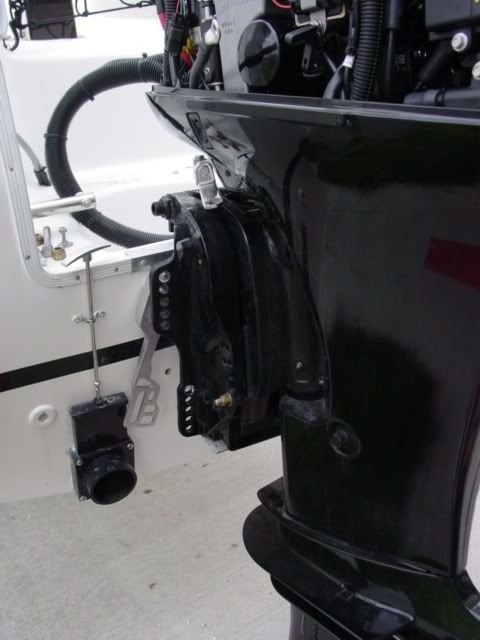
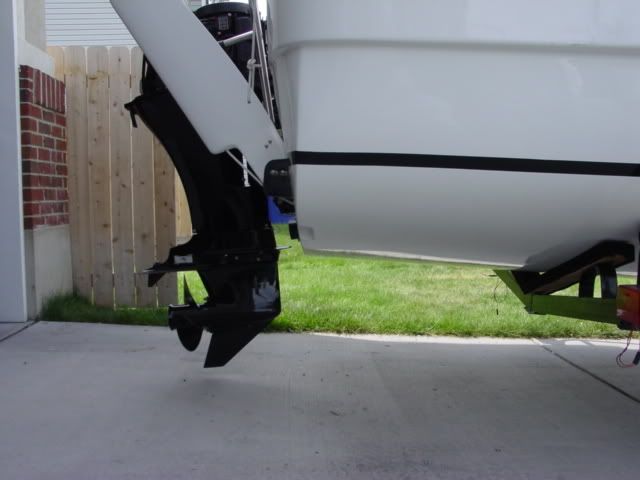
Here's a shot with the hoist attached. It gives an idea of the max angle you can possibly get with the factory transom and Mercury 60 Bigfoot. Notice that even with the engine all the way down there is very little negative angle...no wonder the bow rides so high.
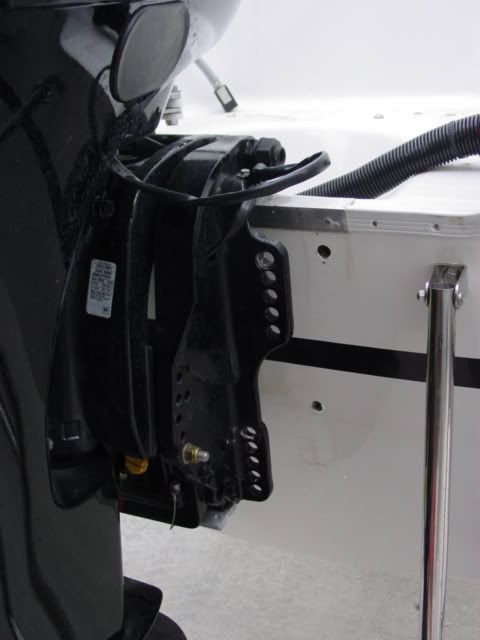
Now that your engine is safely supported you have four bolts and locknuts to remove.
The top ones are easy. You'll want to use the deep socket on the outside upper lock nut, and the regular socket on the inside:
Outside:

Inside:
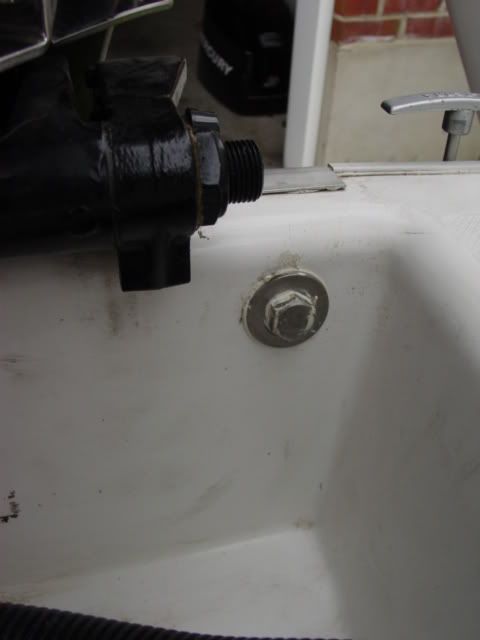
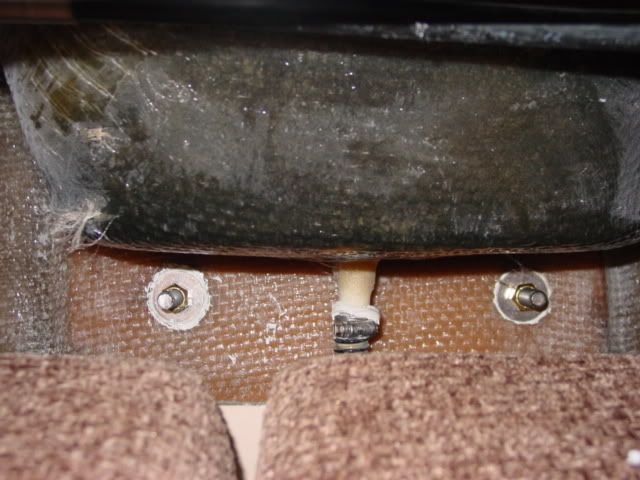
The lowers are a bit more difficult unless you have a helper. I did this time, but didn't when I installed the engine. If you don't have a helper just place a wrech with a deep socket on the bolt and you should be able to jam it enough that it'll stay in place. Otherwise, just get someone to go in the boat and hold it for you. These bolts are behind the long narrow cover inside the aft section of the cabin.
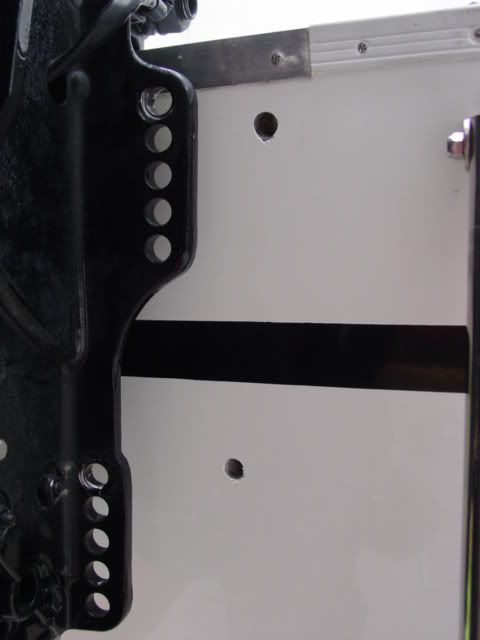
Once the nuts are off the bolts, you'll find that if you engine was mounted on the lowest mounting holes you wont be able to slide it forwards because it catches on the lip, so you'll have to remove the bolts for the upper mounts as well.

Now that the engine is free, hoist it up a little to get it out of the way and you'll see some excess 5200, and other gunk.
You'll want to scrap off the excess 5200 with the razor blade and clean up the rest of the area with Acetone. You'll probalby want to wear some gloves when you do this...I'm not smart enough though...more on that later.
Now it's time for the worst part. You'll need to apply 5200 to the top bolts. These are the new 1/2 x 4 1/2 that you purchased. I firmly believe that 5200 is some sort of pigeon excrement spawned by a bird possessed by the Evil One. No matter how hard you try it will find it's way onto places that you know you did not touch, it will spread like a virus, and coat things with the alacrity normally reserved for Politicians' words in a room full special interest groups with open checkbooks. But I digress....Fortunately the almighty has provided an antidote to the 5200 and that is in the miracle that is Acetone. Have plenty on hand, and on boat, and on tools, on whatever you set the tube down on to...
Make sure to apply the 5200 liberally to the bolts. The reason for this is that the transom is reinforced with wood. Wood + Water = BAD. You don't want water to be able to get in there. I apply around the bolt then push the bolt through and rotate the bolt around to make sure it spreads out.
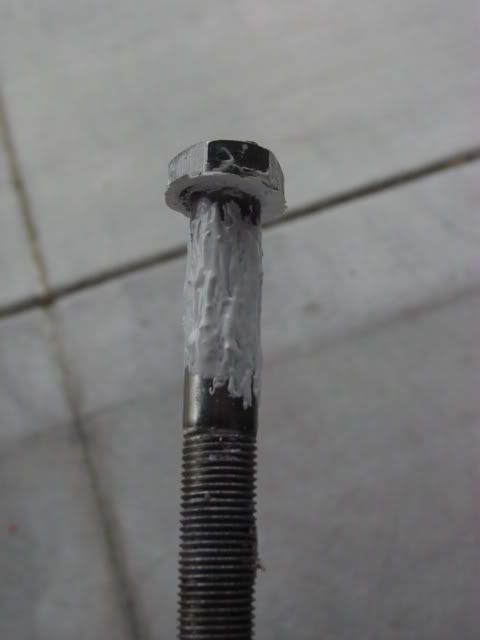
Once that is finished I put some more on the protruding end and spread that around:
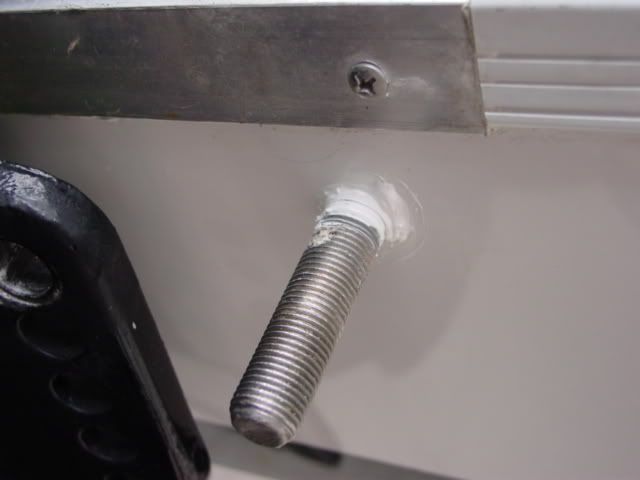
Once the top bolts are in place you'll want to hang the transom wedges in place as shown in the following pictures:
Starborad:
Port:
Now hang your engine back on the bolts. I decided to raise the engine one hole instead of hanging it on the top most hole. This was based on the fact that I'm not getting the preformance I should be from my props.
My cavitation plate was just over an inch below the bottom of the boat on the top most hole and it is really not supposed to be more than an inch. After talking with the shop that I does my engine work, they suggested that I raise it up to see how it goes.
Once the engine is hung on the top bolts apply 5200 to the lower bolts and push them through. Make sure the wedges are in place and then it's just a matter of tightening everything back up.

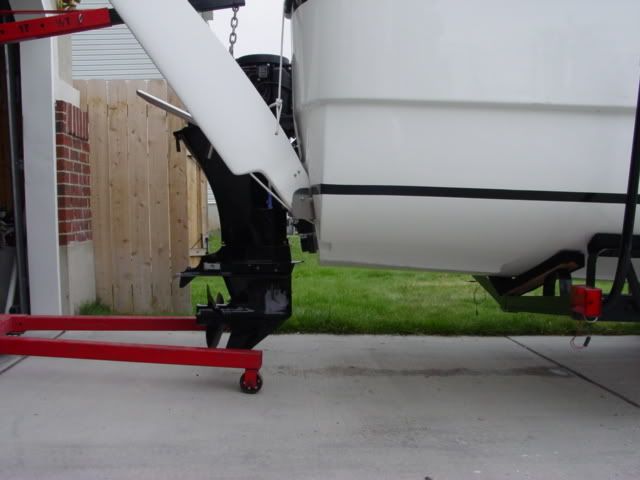
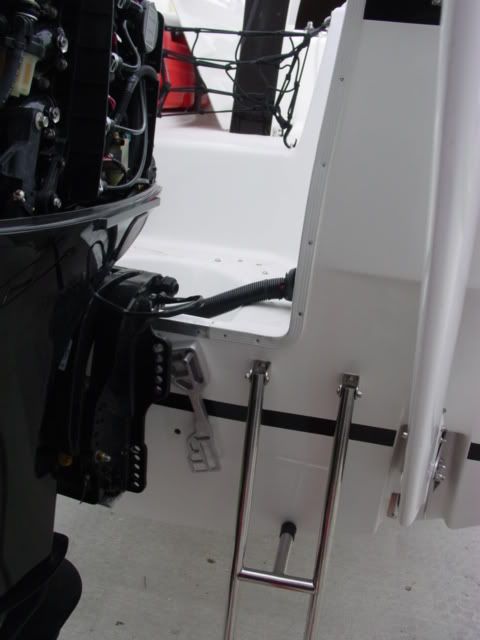
Here you can see the new angle that I can get with the wedges in place. It's clear the the engine can "tuck" under the boat now.
This should finally allow me to actually trim down the motor. In the past regardless of how much down trim I put on the motor it didn't really make any difference. That goes against everything that manual says about how the boat should behave. Because of that fact and the other arguements I've seen on the board I've decided to give the wedges a try in the hopes that the up and down trim will actually trim something.
I'll report back when I have time to take it out.
First you will need to gather together some supplies. For the wedges I purchased these:
http://www.overtons.com/modperl/product ... Wedge_pair
You can also find them at West Marine.
You'll also need an engine hoist, a few socket wrenchs, a 19mm regular and deep socket, a 13mm socket, a razor blade and some 3M 5200:
Finally, this is something I found out half way through, you'll need two 1/2" x 4 1/2" stainless bolts with corresponding stainless locknuts for the upper mounts.
So now you have your stuff you'll have your engine that looks like this:
First remove the cover:
Next, while your boat power should be off, to be safe remove the negative ground cable witht he 13mm socket and also don't forget to remove the fuel line:
You'll notice at the top in the center of the picture above is a metal loop. That is what you'll attach your hoist to. Attach it and put just enough tension on it that the weight will be off the bolts after you loosen them.
Here's a shot with the hoist attached. It gives an idea of the max angle you can possibly get with the factory transom and Mercury 60 Bigfoot. Notice that even with the engine all the way down there is very little negative angle...no wonder the bow rides so high.
Now that your engine is safely supported you have four bolts and locknuts to remove.
The top ones are easy. You'll want to use the deep socket on the outside upper lock nut, and the regular socket on the inside:
Outside:
Inside:
The lowers are a bit more difficult unless you have a helper. I did this time, but didn't when I installed the engine. If you don't have a helper just place a wrech with a deep socket on the bolt and you should be able to jam it enough that it'll stay in place. Otherwise, just get someone to go in the boat and hold it for you. These bolts are behind the long narrow cover inside the aft section of the cabin.
Once the nuts are off the bolts, you'll find that if you engine was mounted on the lowest mounting holes you wont be able to slide it forwards because it catches on the lip, so you'll have to remove the bolts for the upper mounts as well.
Now that the engine is free, hoist it up a little to get it out of the way and you'll see some excess 5200, and other gunk.
You'll want to scrap off the excess 5200 with the razor blade and clean up the rest of the area with Acetone. You'll probalby want to wear some gloves when you do this...I'm not smart enough though...more on that later.
Now it's time for the worst part. You'll need to apply 5200 to the top bolts. These are the new 1/2 x 4 1/2 that you purchased. I firmly believe that 5200 is some sort of pigeon excrement spawned by a bird possessed by the Evil One. No matter how hard you try it will find it's way onto places that you know you did not touch, it will spread like a virus, and coat things with the alacrity normally reserved for Politicians' words in a room full special interest groups with open checkbooks. But I digress....Fortunately the almighty has provided an antidote to the 5200 and that is in the miracle that is Acetone. Have plenty on hand, and on boat, and on tools, on whatever you set the tube down on to...
Make sure to apply the 5200 liberally to the bolts. The reason for this is that the transom is reinforced with wood. Wood + Water = BAD. You don't want water to be able to get in there. I apply around the bolt then push the bolt through and rotate the bolt around to make sure it spreads out.
Once that is finished I put some more on the protruding end and spread that around:
Once the top bolts are in place you'll want to hang the transom wedges in place as shown in the following pictures:
Starborad:
Port:
Now hang your engine back on the bolts. I decided to raise the engine one hole instead of hanging it on the top most hole. This was based on the fact that I'm not getting the preformance I should be from my props.
My cavitation plate was just over an inch below the bottom of the boat on the top most hole and it is really not supposed to be more than an inch. After talking with the shop that I does my engine work, they suggested that I raise it up to see how it goes.
Once the engine is hung on the top bolts apply 5200 to the lower bolts and push them through. Make sure the wedges are in place and then it's just a matter of tightening everything back up.
Here you can see the new angle that I can get with the wedges in place. It's clear the the engine can "tuck" under the boat now.
This should finally allow me to actually trim down the motor. In the past regardless of how much down trim I put on the motor it didn't really make any difference. That goes against everything that manual says about how the boat should behave. Because of that fact and the other arguements I've seen on the board I've decided to give the wedges a try in the hopes that the up and down trim will actually trim something.
I'll report back when I have time to take it out.


