Page 1 of 2
1979 Mac/Venture 25 Restoration Project
Posted: Thu Apr 25, 2013 10:19 am
by Dudesen25
Hello,
I thought after many months of reading the forums during my restoration of my own Mac/Venture 25 I thought I would finally post some pictures of my own progress and join the conversation!
I will put together a full write up of upgrades and what has been done to the boat so far, when I get a chance. All the work has been done by myself all while going to college full time and working, so it has been a slow process, but amazingly rewarding...
Before and After Pics-
First Day I got the Boat:

As of Today:
Re: 1979 Mac/Venture 25 Restoration Project
Posted: Thu Apr 25, 2013 12:30 pm
by kmclemore
Outstanding job, and something to be proud of. It's one heck of a lot of work but will leave you with a boat you can enjoy for many years to come. As someone who restores a great many different things (antiques, furniture, Victrolas, music boxes and cars), I have a special appreciation for the craftsmanship it takes to bring something back from 'the dead'.
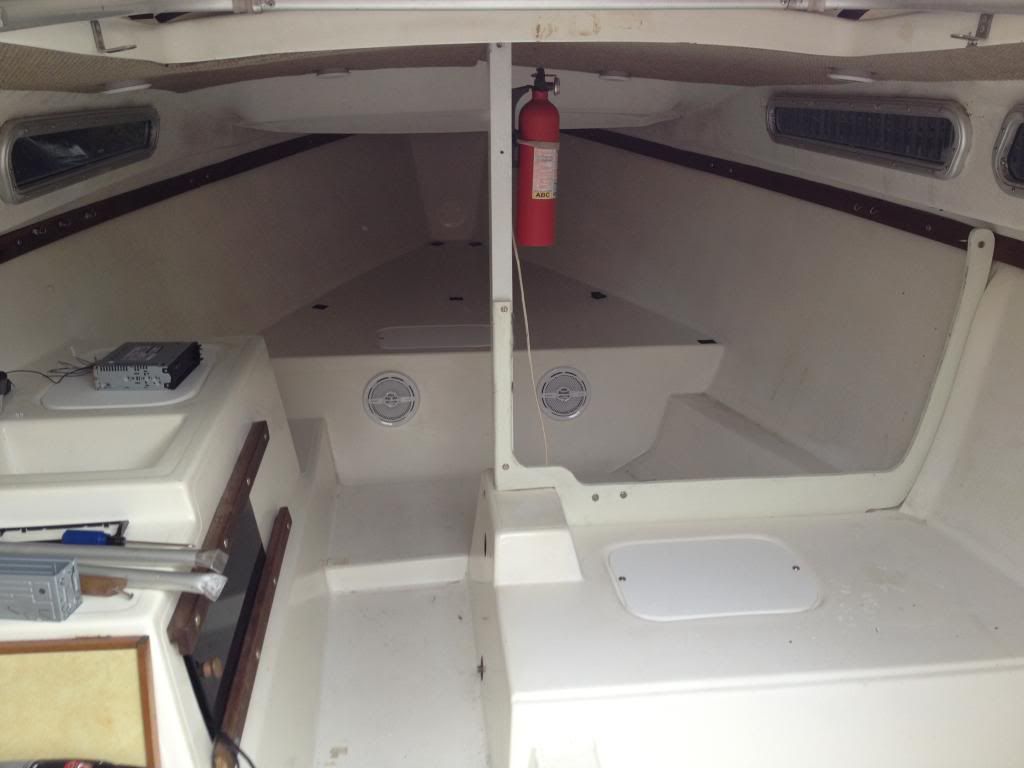
Any photos of the inside (before / after)?
Re: 1979 Mac/Venture 25 Restoration Project
Posted: Thu Apr 25, 2013 12:47 pm
by THE CUSCUS
Looks great! Looking forward to seeing & reading about your mods.
Re: 1979 Mac/Venture 25 Restoration Project
Posted: Thu Apr 25, 2013 1:54 pm
by Dudesen25
kmclemore wrote:Outstanding job, and something to be proud of. It's one heck of a lot of work but will leave you with a boat you can enjoy for many years to come. As someone who restores a great many different things (antiques, furniture, Victrolas, music boxes and cars), I have a special appreciation for the craftsmanship it takes to bring something back from 'the dead'.
Any photos of the inside (before / after)?
Thanks for the kind words! I find a great deal of satisfaction in restoring old and tarnished things, but this is by far the biggest project I have taken on.
Re: 1979 Mac/Venture 25 Restoration Project
Posted: Thu Apr 25, 2013 2:27 pm
by Dudesen25
Here is a list, off the top of my head, of the current mods/work done:
Boat:
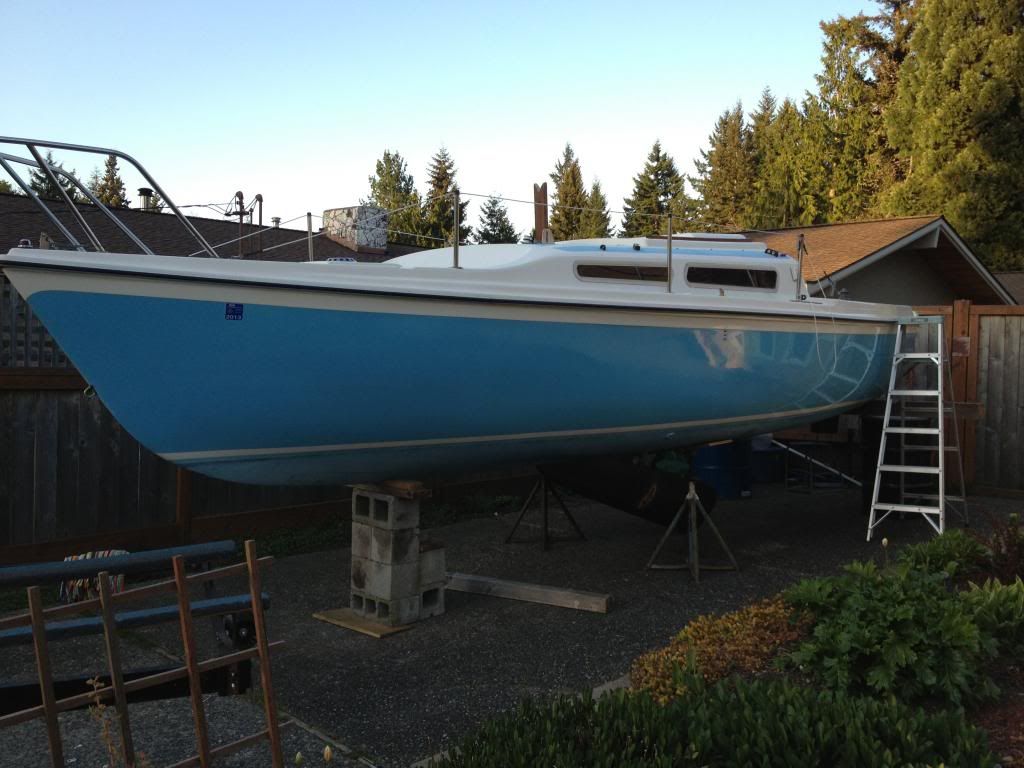
1. Obviously (from the pictures), compounding, polishing, waxing, and UV sealant on the hull and cockpit. Still working on finishing this process on the topside.
2. Windows cleaned and resealed
3. Limo window tint applied to windows
4. Refinished all of the wood trim pieces with Spar Varnish (don't like the weathered look), including interior pieces.
5. Keel was cleaned and painted with multiple coats of rustoleum
6.Removed all of the old fake laminated teak plywood from the interior and replaced with higher quality plywood, which I stained and finished with spar varnish
7. replaced all of the interior hatches with HDPE 3/8'' plastic sheets (same stuff industrial grade cutting boards are made out of)
8. Moved the styrofoam flotation blocks from the stern, cut them into cubes, and filled the interior bilge area's with the cubes.
9. Pretty much all of the through hole fittings have been resealed.
10. Stern through hole fittings removed, filled with epoxy, and in the process of re-drilling, sealing, and mounting the pulpit and other stern fittings again.
11. Replaced the interior headliner with new plywood upholstered with outdoor carpeting.
12. Installed battery powered wirelessly controlled interior LED lights to the headliner.
13. Installed v-birth hatch to access the D-ring
14. Re-sealed D-ring
15. Re-sealed the rudder mounting brackets.
16. Currently building a new rudder (old one is freakin' heavy because it is so water-logged and I can't get it to dry out)
17. New mainsheet and halyards
18. Hardware installed to run the halyards back to the cockpit
19. Replaced broken/worn out blocks and cleats.
20. Removed all of the old instruments
21. Stereo installed
22. Sail Winches serviced
23. Serviced the 8HP Outboard
24. Refinished the tiller
25. New battery
26. Oh, and LOTS OF CLEANING!!!
Trailer:
1. New bunks installed with new carpet
2. New winch
3. New lights
4. New rollers
5. Side-bunks fabricated and installed
6. Lots of welding to repair corroded joints and welds
7. Axle serviced
8. Soon to have new axle and electric trailer brakes installed
To Do's:
1. Build a raised floor for the stern storage area (below the cockpit), so it can be used for dry storage.
2. Fabricate a line/equipment organizer for the area below the cockpit hatch
3. figure out more storage for the cabin
4. Install new running lights
5. Install all new electrical
This is just a brain dump, so if I remember anything else i'll add it to the list...
More pictures to come!
Re: 1979 Mac/Venture 25 Restoration Project
Posted: Thu Apr 25, 2013 4:00 pm
by vizwhiz
Wow...that's quite a list! Awesome results on the paint, by the way!
Re: 1979 Mac/Venture 25 Restoration Project
Posted: Fri Apr 26, 2013 11:27 am
by Tsatzsue
Nice!! These guys are 25 pros and have done amazing work to thier boats. They offer a lot of good advice. I have the same hull color and have had a hard time getting through the muddled blue. I spent a whole weekend componding , glazing and waxing and did not get the results you did. I find the harsest thing is finding the time to sail her after working on her and having a life outside of sailing. Kep up the good work.
Re: 1979 Mac/Venture 25 Restoration Project
Posted: Mon Apr 29, 2013 3:52 am
by Catigale
Dude(sen)
Beautiful job on that paint, I would love to see some inside pix.
(Preacher hat on)....you really shouldn't use concrete blocks for blocking, especially side on as you are in that pic. It's much safer to use solid wood blocks. The crush failure of blocks is surprisingly low, and if they are left out in the weather, the concrete loses its new strength amazingly fast. In New England, I've picked up many blocks left out for 2-3 years and have them crumble in my hands.
Re: 1979 Mac/Venture 25 Restoration Project
Posted: Mon Apr 29, 2013 8:29 pm
by Dudesen25
Catigale wrote:Dude(sen)
Beautiful job on that paint, I would love to see some inside pix.
(Preacher hat on)....you really shouldn't use concrete blocks for blocking, especially side on as you are in that pic. It's much safer to use solid wood blocks. The crush failure of blocks is surprisingly low, and if they are left out in the weather, the concrete loses its new strength amazingly fast. In New England, I've picked up many blocks left out for 2-3 years and have them crumble in my hands.
I agree with your worries, but this is only a temporary solution for jacking the boat up, I just needed to lift it off the trailer for a few days to do some welding on the trailer and I could't use my usual wood blocking method in the location I had to jack the boat up so this was my only solution. Although, I did compensate for this by putting more of the weight of the boat on the two boat jacks, which took a lot of the pressure off of the concrete tower. Preach On!

Re: 1979 Mac/Venture 25 Restoration Project
Posted: Tue Apr 30, 2013 4:45 am
by Tomfoolery
That's some sharp looking boat! Great work.

Interior shots coming?

Re: 1979 Mac/Venture 25 Restoration Project
Posted: Tue Apr 30, 2013 12:40 pm
by Tsatzsue
How did you get the color out? I have the same boat, same color and it looked like the original pic. I compounded, buffed and glazed. I was worried about not having any gel coat left. I t was good but not as good as yours. I can't find a way to attach a pic.
Re: 1979 Mac/Venture 25 Restoration Project
Posted: Tue Apr 30, 2013 1:14 pm
by Tomfoolery
Tsatzsue wrote:I can't find a way to attach a pic.
Click on this link ->
http://www.tinypic.com <- , click on 'browse' to find the pic you want to post, click on the big green 'Upload Now!' button, answer the security question, then copy and paste the entire second link from the top of the four links it will return with. This line has the ubb code on each end already, so just copy it and paste it into your post. Click 'Preview' on your reply page to see if it comes out right, but do know that the preview page will show the reduced size thumbnail - click on the thumbnail to see the full sized pic as uploaded. If it's too big, or if you know it's too big before uploading it, you can pick a smaller size before hitting the Upload Now! button. No account required, quick and dirty method to get a picture posted here.
Instructions posted so we can see your pics.
Re: 1979 Mac/Venture 25 Restoration Project
Posted: Tue Apr 30, 2013 7:02 pm
by Dudesen25
Re: 1979 Mac/Venture 25 Restoration Project
Posted: Tue Apr 30, 2013 7:07 pm
by Dudesen25
Interior is not much to look at right now since I have everything stripped out and I still need to get new cushions made, but here is a pic anyways...
Re: 1979 Mac/Venture 25 Restoration Project
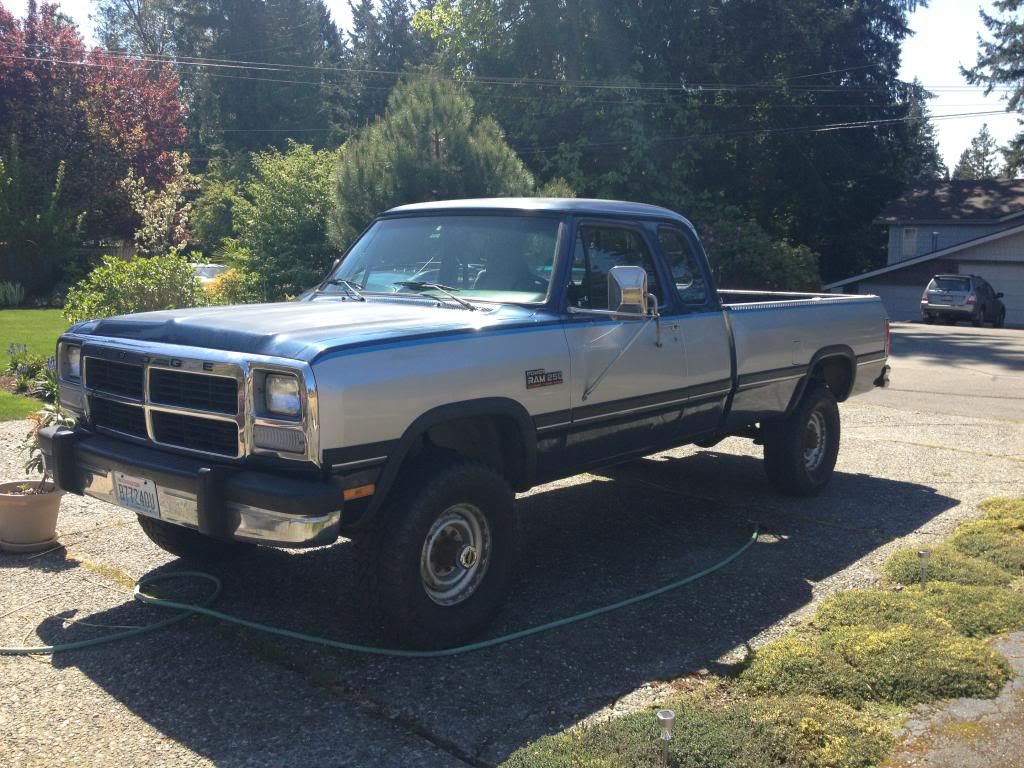
Posted: Sat May 04, 2013 7:38 am
by Dudesen25
Well, I am one step closer to having the perfect trailer sailing rig, just bought a new truck that could probably tow a house, and will easily get the boat wherever the winds are. Although, this does mean that the boat project budget is a bit drained until I can sell my old truck.